

“Practical Permaculture” is a column written by Santa Fe Permaculture’s founder and President, Nate Downey. It appears in “The Santa Fe New Mexican’s” monthly Real Estate Guide.
A short course: How to make Pumice Wicks
Its been a wet October after months and months of nada from the sky. Do you know where your water went? Most of it probably careened off your land via an arroyo or storm sewer, as opposed to being used by plants in your landscape. Why not store this water in a no-maintenance pumice wick? These invisible sponges underground are easy to install.
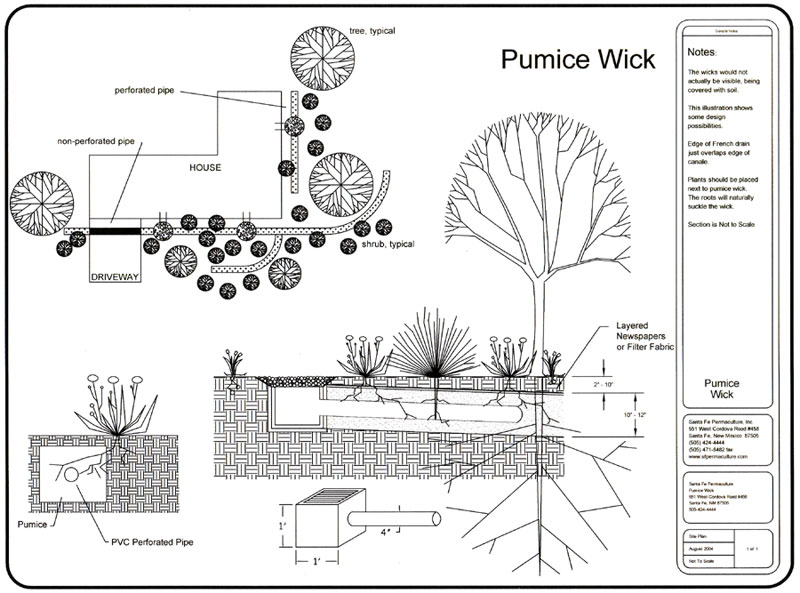
Click to enlarge
Pumice is a white, lava rock extracted from the Jemez Mountains. There are companies that mine and transport pumice in not-so-environmentally-friendly ways but since the advantages of pumice wicks are great, the effects of mining should not preclude their use.
Pumice is extremely light and porous and costs about $30 per cubic yard and many sand and gravel companies sell it. Try to get pea-gravel-sized pumice. It seems to work best.
The basic idea behind these wicks is to harvest runoff from any impervious surface. When plants are planted on either side of the wick, they are given a supply of moisture at their root zones for weeks or even months after every rain. Wicks are not to be installed too close to existing vegetation, because trenching damages root zones and can do more harm than good.
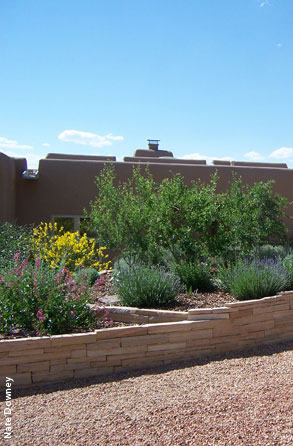
Pumice wicks embody such permaculture principles as making the least change for the greatest possible effect but for landowners with our erosive desert soils, the most important permaculture principle pertaining to wicks is, Every element in the system should perform more than one function.
Of course, the main function of pumice wicks is to harvest rainwater, but another function is that they help to control erosion. Instead of allowing gallons of water to pour off of roofs and roads, wicks reduce the quantity and velocity of stormwater runoff, which in turn prevents soil from washing away. This function is certainly beneficial to those who care about their valuable property.
Here are some basic guidelines for building pumice wicks in association with a roof. This process can be adapted to harvest water from driveways, roads and patios, too. the owners of challenging sites will benefit from the advice of a drainage expert.
Under your canale or downspout, dig a 3-foot-diameter hole. Fill the hole with one foot of gravel. Place a 12-inch-cube box drain on the gravel with the outflow hole for a 4-inch sewer and drain pipe facing toward your future wick.
Next, dig a trench eight to 10 inches wide and around 17 inches deep. Trenches should drop a half-inch every 10 feet. Keep the trenches at least three feet away from foundations. Trenches longer than 20 feet should have perforated pipes running down the middle of the pumice so water will be released evenly. If you want to use water far from the canale, the location must be downhill. Run 4-inch (unperforated) pipe from the canale to the desired location, and begin your wick.
Add 10 to 12 inches of pumice to the bottom of the trench then on top a layer of 20-24 sheets of newspaper, which will prevent dirt from clogging the pumice. Backfill the trench with dirt (over the newspaper) and tamp.
Finally go back to your hole. Fill in gravel around your box drain. In the case of canales create a funnel to direct water from the roof into the box drain using a piece of thick plastic, such as shower liner. Cover the drain with gravel, and youre almost done.
The last step is to ensure that runoff has an appropriate place to go when the wick is saturated. To this end, simply make sure water from your saturated wick flows into a neighboring French drain, which readers of this column understand as that oh-so complex water harvesting technique, the gravel-filled hole.
Published: June, 2000 | Copyright © 2000, Nate Downey.